Download a branding style
To download a branding style:
1. Click Download or Delete Branding on the first page.
2. Click the Download link next to the style you would like to download.
-
If you have never downloaded the style before, click Download (System). If you have already customized and uploaded a version of this style, you will have the option to select Download (Yours) to re-download this style.
-
A
*.tar.gzfile will download to your computer.
Edit a branding style
Once you have downloaded the style you would like to edit:
1. Extract the contents of the file. To accomplish this:
-
If you are using a Windows® machine, you will need to download a program (such as winRAR) to extract the contents of the file. By default, Windows will not handle a .tar.gz file.
-
If you are running a Mac® or *nix machine, you may use the
tar -xvzfcommand from the CLI to extract the contents of the.tar.gz file, or you may simply open it with whatever extraction program you prefer.
2. Change the files to your liking.
-
The size of the pictures contained within the .tar.gz file must stay the same to maintain the appearance of the style.
-
You will need to leave the file names the same, otherwise the server will not know where to place the files in the interface.
3. Before uploading the files to the server, place them back into a .tar.gz file.
-
On a Windows machine, use the same program you used to extract the contents to replace the new content in a .tar.gz file.
-
On a *nix machine, you may use the
tar -cvzfcommand or compress the contents of the file back into a .tar.gz file with whatever compression software you choose.

Upload a Branding Style
To upload a new branding style:
1. Click Create or Upload Branding on the first page.
2. Click the Choose File button.

Delete a Branding Style
To delete a branding style that you have uploaded:
1. Click Download or Delete Branding on the first page.
2. Click Delete Style next to the branding style you would like to remove from your server.
3. Confirm that you would like to remove the style by clicking Yes on the following page.
-
Click No to keep the style.
![]() Note: You will not be able to delete the Root (default) style installed with cPanel.
Note: You will not be able to delete the Root (default) style installed with cPanel.
The Branding Editor Home Screen
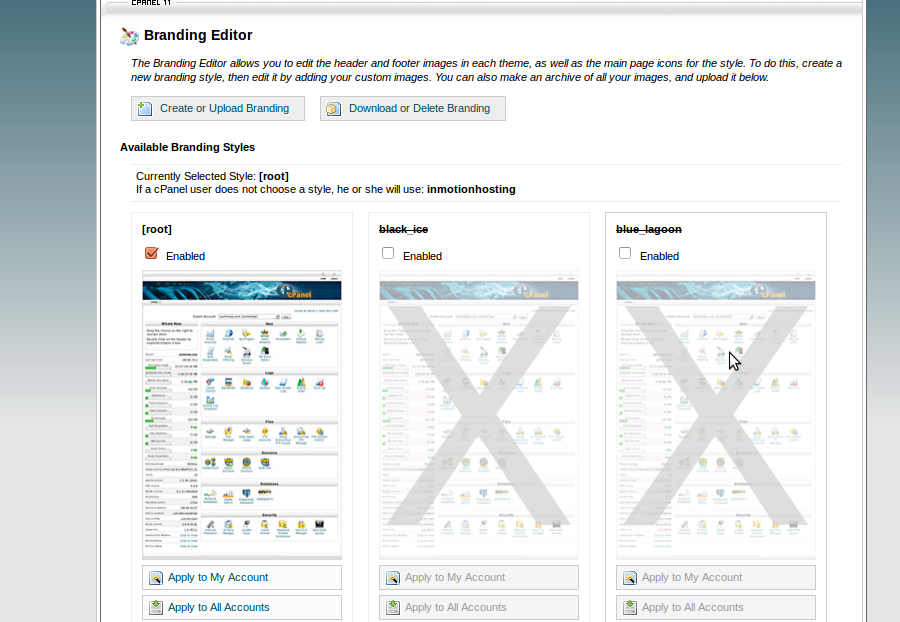
The Branding Editor home screen also has a number of options for existing styles (as shown in the figure below) on your server. You may access a list of 4 options below each style on your server and 1 checkbox above the style.

Using these options:
-
To make a style available to users, click the Enabled checkbox above the style.
-
To use a style for your own cPanel account, click Apply to My Account.
-
To use a style for all of your users’ accounts, click Apply to All Accounts.
-
If you accessed this Branding Editor by selecting a theme from the WHM Branding screen, then this option only applies to accounts that use the selected theme.
-
If you are a reseller, this option only applies to accounts you own that use the selected theme.
-
-
To select a style as the default skin for new accounts, click Set Default for New Accounts.
-
To edit a style, click Edit This Style.
When you select this option, you are presented with the following options that allow you to edit various parts of the cPanel interface:
-
Edit Logos
-
Edit Icons
-
Edit Header/Footer
-
Edit UI (user interface)
-
Edit Preview Images
-
Edit HTML Pages
-
Edit Style-sheet
Change a Logo
To change a logo:
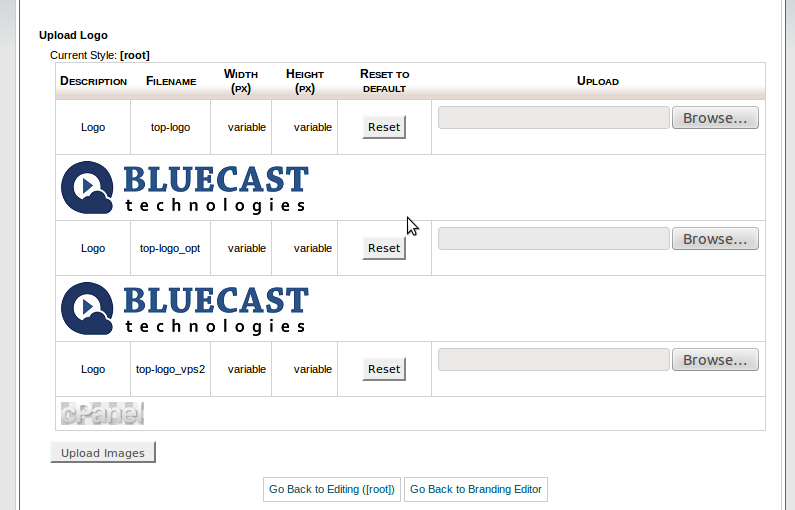
1. Click Edit Logos. cPanel will display the Edit Logos screen.
-
Logos are located in the upper portion of your cPanel interface. Use the picture on the screen for reference.
2. Click the Choose File button.
-
The new logo must be named
top-logo.png. -
You may click Reset to return to the default logo.
3. Select the file from your computer that you would like to use as the new logo.
4. Click Upload Images.
5. Your logo will now appear at the top of the Edit Logos screen.
-
Select and drag the logo to the location where you want it to appear.
-
Resize the logo using the handles that appear when you place the cursor over it.
-
The CSS code in the middle of the screen will update accordingly whenever you move the logo. From here, you can cut and paste it into the Edit Style-sheet screen (click the edit link to access this screen).
Change an Icon
To change an icon:
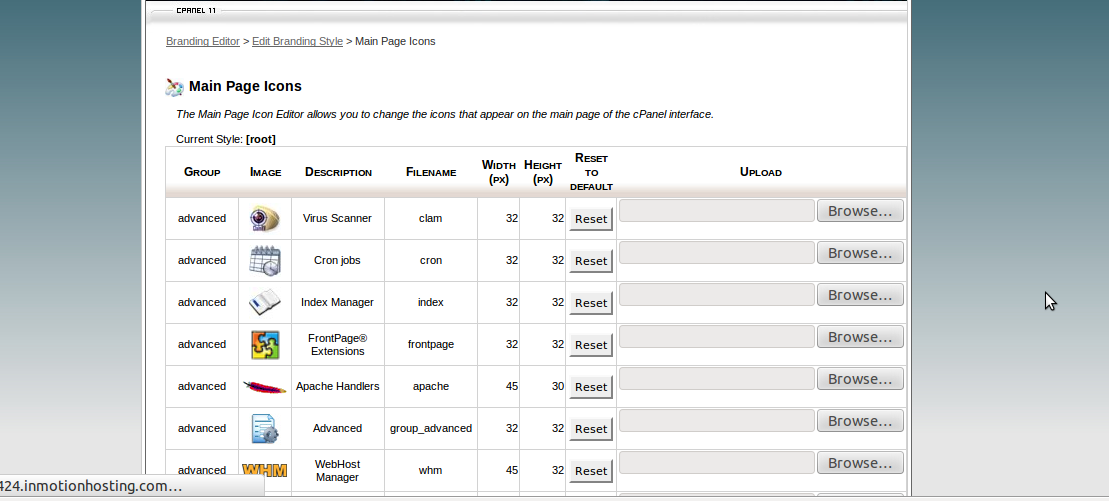
1. Click Edit Icons.
-
Icons are located on the main screen of the cPanel interface. They are used to highlight features for your users.
2. Click the Choose File button.
-
The custom icons must have the same filenames as the originals.
-
You may click Reset to return to the default icon.
Select the file you wish to use as an icon from your computer.
3. At the bottom of the screen, click Upload Images.
-
You may click Reset All Icons to return all icons to the default icons.
-
You may click Generate Sprites if your icon is not displayed properly. This will regenerate the cPanel file that contains your icon(s), and may fix the problem.
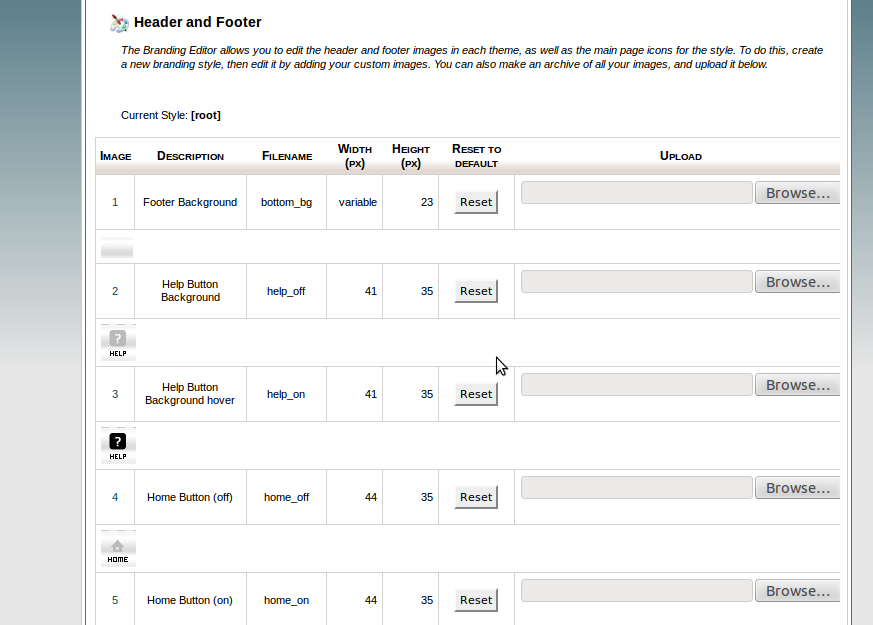
Change Headers and Footers
To change headers and footers:
1. Click Edit Header/Footer.
-
Headers and footers are located at the top and bottom of the cPanel interface and often serve as consistent links to commonly accessed sections of the interface.
2. Locate the image you wish to replace. To assist you in finding the correct image:
-
Red numbers appear in the header and footer of the page. When you click a number, the corresponding file will blink.
-
Likewise, each file has a clickable image number. When you click the number, the corresponding header or footer image will blink.
3. Click the Choose File button.
-
The custom headers or footers must have the same filenames as the originals.
-
You may click Reset to return a header or footer to its default.
Select the file you would like to use as an icon from your computer.
